How to start using coretest_hashes on the Novena PVT1
This is a writeup on how to setup, build and testrun the coretest_hashes Cryptech subsystem on a Novena PVT1 development board.
Getting started with Novena
Novena is an open hardware and F/OSS-friendly computing platform.
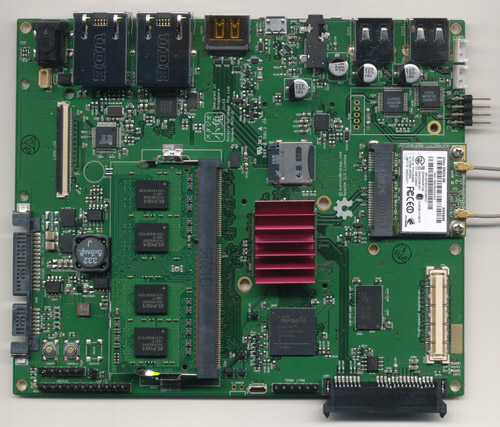
It is a small single-board Linux PC, which happens to include a Xilinx Spartan-6 FPGA. This, together with the TerasIC Cyclone 5 GX, is what we are using to develop and test the Cryptech cores.
The Novena includes an HDMI adapter and two USB ports, so you can plug in a monitor, keyboard, and mouse, and have a graphical desktop environment. However, I prefer to run it headless, and ssh to it. To ssh to the Novena, you need to know its IP address, which means you need to either statically configure it, or you need to assign it an address in your DHCP server.
If you go the DHCP route, be aware that Novena doesn't used a fixed hardware address, so you'll have to statically configure that.
Open /etc/network/interfaces, and add something like the following lines:
allow-hotplug eth0
iface eth0 inet dhcp
  hwaddress ether 00:0e:c6:87:72:01
- The specific CPU on the Novena is the Freescale i.MX6 MCIMX6Q5EYM12AC device. A quad core, ARM A9 device running at 1.2 GHz.
- The specific FPGA on the Novena is the Xilinx Spartan-6 XC6SLX45-3CSG324C device.
- Here are the schematics for the Novena PVT2 board.
Coretest_hashes
The coretest_hashes is a subsystem that is a FPGA design that contains Cryptech application cores as well as support cores used to run tests of the SHA-1 and SHA-2 hash functions from the host computer via an I2C serial bus. The subsystem consists of:
-
sha1: A HW implementation of the SHA-1 hash function.
-
sha256: A HW implementation of the SHA-256 hash function.
-
sha512: A HW implementation of the SHA-512 hash function.
-
coretest: A command parser that accepts read/write commands from a host, executes the commands and sends the response.
-
i2c: A serial interface that connects coretest to the host.
-
novena: A top-level wrapper that connects all
the cores, and connects i2c to external pins as well as clk and reset. This repo also contains userland software that talks to coretest and performs tests of the sha1, sha256, and sha512 cores.
Software and system requirements
You need to download and install the Xilinx ISE Design Suite.
Note: this software runs on a Windows or x86 Linux host, not on the Novena.
Installing on Linux
The Windows install is pretty straight-forward. So is the Linux install, but with a few extra notes:
-
Xilinx only supports specific versions of Red Hat and Suse Linux, but it does run on Ubuntu, with the following caveat: Ubuntu symlinks
/bin/shtodash, which can't handleif [ ]syntax in shell scripts, so I symlinked/bin/shtobashinstead. -
ISE Design Suite uses a graphical installer, so has to be installed on a desktop edition, not a server edition.
-
Although the software can be installed as user or root, by default it wants to install into
/opt/Xilinx, so you need to install as root if you want to do that. -
The Xilinx tools are disk hogs, so if you're building a VM for this, you'll probably want to give it at least 30-40 GB of disk space.
Step-by-step installation:
1. Unpack Xilinx_ISE_DS_Lin_14.7_1015_1.tar (or whatever version you have).
2. cd to Xilinx_ISE_DS_Lin_14.7_1015_1, and run sudo ./xsetup
3. Click through two screens of license agreements.
4. Select ISE WebPACK.
5. Unselect (or leave unselected) Install Cable Drivers.
6. Go!
Well, not quite. You will need to convince the ISE that you have a license.
On the page http://www.xilinx.com/products/design-tools/ise-design-suite/ise-webpack.htm click on the Licensing Solutions link. On the resulting page, expand the section Obtain a license for Free or Evaluation product. To download the ISE Webpack, you should have created an account, so now you can go to the Licensing Site and use that account to create a Certificate Based License.
You do not need to go through the HostID dance, just say Do It. You will then receive a certificate in email (not an X.509 certificate) which you will be able to use. Then start the ISE Webpack by issuing the command ise. Go to the Help menu and Manage Licenses. Use the resulting new License Manager window to install the .lic file. This process is complex and flakey.
Here is a more detailed description of installing ISE in Ubuntu.
Platforms on which at least one person has done this succesfully:
- ISE 14.7 on a 32-bit Debian Wheezy VM running under VirtualBox on MacOSX.
- ISE 14.7 on a 64-bit Debian Jessie VM running under virsh/kvm.
- ISE 14.7 on 32-bit Debian Jessie on a Shuttle XS36V.
Downloading the cores
Create a project directory, e.g. coretest/core.
The cores we need to build the subsystem must be downloaded from the Cryptech server. Check them out one by one:
#!sh
git clone http://git.cryptech.is/core/sha1.git
git clone http://git.cryptech.is/core/sha256.git
git clone http://git.cryptech.is/core/sha512.git
git clone http://git.cryptech.is/core/i2c.git
git clone http://git.cryptech.is/core/coretest.git
git clone http://git.cryptech.is/core/novena.git
If you are a cryptech core member, use the ssh method, e.g.
git clone git@git.cryptech.is:core/sha1.git
Building the cores
Building in Linux command-line
Go to novena/synth and run make.
Depending on your version of ISE Design Suite, where you installed it,
and whether you're running it on 32-bit or 64-bit hardware, you may
have to change the isedir and xil_env values in Makefile.
Building in the ISE application
On Windows, open the Project Navigator link.
On Linux, run e.g. /opt/Xilinx/14.7/ISE_DS/ISE/bin/lin64/ise
a. Create the project:
Select File > New Project
- Name: novena
- Location: .../toolruns (automatically appends "novena")
- Family: Spartan6
- Device: XC6SLX45
- Package: CSG324
- Speed: -3
b. Add files to the project:
- coretest/src/rtl/coretest.v
- coretest_test_core/src/rtl/coretest_test_core.v
- i2c/src/rtl/i2c.v
- i2c/src/rtl/i2c_core.v
- novena/src/rtl/coretest_hashes.v
- novena/src/rtl/novena_fpga.v
- novena/synth/coretest-novena.ucf
- sha1/src/rtl/sha1.v
- sha1/src/rtl/sha1_core.v
- sha1/src/rtl/sha1_w_mem.v
- sha256/src/rtl/sha256.v
- sha256/src/rtl/sha256_core.v
- sha256/src/rtl/sha256_k_constants.v
- sha256/src/rtl/sha256_w_mem.v
- sha512/src/rtl/sha512.v
- sha512/src/rtl/sha512_core.v
- sha512/src/rtl/sha512_h_constants.v
- sha512/src/rtl/sha512_k_constants.v
- sha512/src/rtl/sha512_w_mem.v
c. Set some non-default options:
Note: these are derived from other Novena projects, and I'm not sure what they mean, but they don't make things blow up.
- In the
Processwindow, right-click onGenerate Programming File, selectProcess Properties....- In
Configuration Options, find-g UnusedPin, and change it fromPull DowntoFloat. - In
Startup Options, find-g DriveDone, and check the box.
- In
d. Build the project
Select Process > Implement Top Module
The expected build time should be something like 5 and 10 minutes, depending on the computer used. Some measured build times for the design:
- 5,30 minutes on MacbookPro 2013 with tools in 64-bit SUSE Linux in VM
- 9,20 minutes on AMD A10-6800K with tools in Windows 7 in Virtualbox VM with one CPU core and 4 GByte RAM.
Running coretest on the Novena
scp the built coretest-novena.bit to the Novena.
Fetch devmem2.c and compile it on the Novena.
scp the following files from novena/src/sw to the Novena:
- configure.sh
- hash_tester.py
To configure the coretest image into the FPGA, run
#!sh
./configure.sh coretest-novena.bit
This should light a small green LED (labeled "fpga") next to the high-speed expansion connector. The console log should be:
Setting export of reset pin
setting reset pin to out
flipping reset
configuring FPGA
11597+1 records in
11597+1 records out
1484509 bytes (1.5 MB) copied, 2.34345 s, 633 kB/s
turning on clock to FPGA
/dev/mem opened.
Memory mapped at address 0x76f51000.
Value at address 0x20C8160 (0x76f51160): 0x40B
Written 0xD2B; readback 0xD2B
Run hash_tester.py to go through the full test suite.